Posted onSep 27, 2017
Are you ready for this year’s Snowfest? We are not talking about the entertainment options but the logistic one. Is your business ready with proper snow removal services plan? Have you appointed some commercial snow removal company so that your office or workshop, or home driveway remains operational during the important Snowfest days?
There are certain essential services that cannot stop under any circumstances. For example, a hospital cannot close down because of a snow storm and a university cannot change its examination schedule for unusual snow deposits. In recent years, it has also caused flooding and severe weather condition creating havoc in people’s lives. So, if you do not have a plan to tackle snow deposits around your building you can find yourself to be cut off from the rest of the world. To stay away from all your worries, talk to a commercial snow removal service today and choose a plan that is the most appropriate one for your establishment. A good company provides snow removal services that are capable of snow and ice management.
They have experienced contractors who know how to handle the seasonal nature of the snow. Even if you have a large area to be cleaned you cannot have all the equipment’s needed for the job. In addition to that, you will have to assign the job to someone who must have a proven credential and experience in handling snow removal. Also, the job may have to be undertaken often at unpredictable hours. But, when you leave the job to the professionals, you can remain free of all these worries.
If you own a business, you definitely need to stay on top of snow removal. Your customers will be turned off by the fact that they can barely walk up to the door, especially if it is covered in frozen water. In fact, even if they want to access the door, they might not be able to due to the mountain of frozen powder piling up. Plus, this could become a safety hazard. If someone gets stuck in it or slips, or otherwise gets hurt, you could be required to pay the medical bills and any property damage. Your insurance should kick in, but your provider could drop you as a customer if it is obvious that the incident could have been avoided. Fortunately, you can probably prevent such an occurrence by just calling a professional company to do this job.
Residential driveways in the mountains always need to be dealt with, with the heavy snows and getting to work and kids off to school need not be an issue when you have a contract with a professional snow removal company.
There are clearly a few reasons to avoid procrastinating in the hopes that the issue will resolve itself before you have to do it on your own. Rather than facing the possibility of people getting hurt on your property, or being unable to get in or out, you should provide yourself with the peace of mind that a professional could give you when it comes to this job.
The biggest mistake with snow removal contracting is waiting to the last minute, its some’s nature, however, when you live in the mountains there’s little room for error when it comes to snow. So, if you're new to the area and know you are going to need assistance, call now, get quotes and seek your best choice now before it’s too late. Most companies have seasonal contracts and some even offer certain benefits to certain conditions, but again don’t wait till everyone is booked up and you have to wait stuck at home or a business.
Posted onAug 25, 2017
A mulch is any material that provides protection and improves the soil when applied to the soil surface.
There are two types of mulches: organic and inorganic.
Depending upon the type, mulches:
Reduce surface evaporation and conserve soil moisture.
Improve water penetration and air movement.
Control soil temperature fluctuations and possibly reduce soil temperature.
Protect shallow-rooted plants from freeze damage and frostheave.
Improve soil structure and nutrient availability.
Help inhibit weed germination.
There are two types of mulches, organic and inorganic. Organic mulches include wood and bark chips, straw, grass clippings and seed hulls. Inorganic or inert mulches include weed-barrier fabrics, gravel and rock.
The ideal mulch does not compact readily. It does not hinder water and air movement into the soil, it is not a fire hazard, and it breaks down slowly. In addition, the ideal mulch is uniform in color, weed-free, attractive and does not blow away.
Selection
The selection of a mulch depends on its intended use. Consider the size of the area in relation to the cost of materials and availability. You may want to ask your professional landscaper for their services, some, not all, homeowners without proper knowledge can overdo it with mulch for the look, but not always helpful to the plant, trees and other landscape greenery you have on your property.
If the main objective is soil improvement, consider an organic mulch that gradually breaks down. If the area is used primarily for annual flowers, it often is more practical to use a temporary organic mulch, such as composted leaves or grass clippings, that can be turned under each fall. Inorganic mulches such as gravel or stone are a good choice where there are permanent plants in a landscape such as trees, shrubs or perennials.
Mulches can be used to prevent soil erosion by wind and rain. In windy areas, gravel or rock mulch may be preferred over lightweight organic mulches. Any mulch that reduces the impact of raindrops will help reduce water erosion, just make sure the soil surface is entirely covered with mulch. Black plastic (polyethylene) is not recommended as a mulch in landscape areas.
Black plastic is impermeable therefore no oxygen exchange can occur in the soil. Lack of oxygen to the roots significantly reduces plant growth. Black plastic also prevents water penetration. If a weed barrier is needed, use landscape fabrics instead to allow water and oxygen exchange.
When to Apply Mulches
Mulches used to enhance appearance and control weeds may be applied at any time. If the mulch will be used to protect fall transplants by keeping soil temperatures above freezing longer into the fall (permitting better root growth), apply soon after transplanting. Reapply or refresh organic mulches after they have begun to break down.
If the mulch is meant to reduce frost heave and delay spring growth, apply after the ground has frozen. This type of mulch often is used to protect small bulbs such as scilla and crocus and to prevent early emergence.
Except where weed-barrier fabrics are used alone or in combination with chips, stones or other material, apply most mulches to a depth of 3 to 4 inches. Apply straw, dried leaves and similar materials to a depth of 4 to 6 inches.
Some mulches, particularly straw and loose leaves, may harbor rodents so do not place them closer than 6 inches to the base of woody plants. When these types of mulches are placed next to the plant, rodents living in the mulch may chew the bark of the plants, girdling and eventually killing them. Mulches in contact with bark of woody plants may keep it too moist.
Preventing Nitrogen Deficiency
As organic mulches decompose, some of the soil nitrogen in contact with the mulch is used by the breakdown organisms. Consequently, nitrogen deficiency may occur. A sign of nitrogen deficiency is a yellowing, primarily of the lower leaves. When this occurs, add nitrogen fertilizers. For every 100 square feet of mulched area, add 2 pounds of a complete fertilizer, such as 10-6-4, or ¼ pound of ammonium sulfate. Never use a “weed-and-feed” type of fertilizer in mulched areas.
Posted onJul 25, 2017
Weeding any area of your landscape can be a daunting task and not for some. You can always hire your landscaper for the extra duty when needed.
Mulch benefits plants by keeping the soil cool and moist and depriving weeds of light. Organic mulches can host crickets and carabid beetles, which seek out and devour thousands of weed seeds.
After a drenching rain, stage a rewarding weeding session by equipping yourself with gloves, a sitting pad, and a trug or tarp for collecting the corpses. As you head out the door, slip an old table fork into your back pocket because there’s nothing better for twisting out tendrils of henbit or chickweed. When going after bigger thugs, use a fishtail weeder to pry up taprooted weeds, like dandelion or dock.
Under dry conditions, weeds sliced off just below the soil line promptly shrivel up and die, especially if your hoe has a sharp edge. In mulched beds, use an old steak knife to sever weeds from their roots, then patch any open spaces left in the mulch.
For larger plots of land. Control, the most common management strategy, reduces a weed population to a level where you can make a living off of or enjoy using the land. Adequate control also may prevent future infestations. There are four control methods: cultural, mechanical, biological and chemical.
Cultural control methods promote growth of desirable plants. Seeding is the most commonly used cultural control method and must be combined with control methods that decrease the target weed population and gives the seeded species an opening in the environment to successfully germinate and establish (colonize). The USDA-Natural Resource Conservation Service is an outstanding source of information as to what species to plant in a particular area and at what rate. Fertilization, irrigation and planting at optimum densities let crops compete with weeds and not with each other. While nitrogen fertilization increases yields in grass hay meadows, it also fosters weed establishment and growth. Fertilize cautiously, especially with nitrogen, and only when necessary as determined by soil testing.
Mechanical control methods physically disrupt weed growth. This is the oldest control method and is used most often worldwide. Tillage, hoeing, hand-pulling, mowing and burning are examples. To mulch or smother weeds often is considered mechanical, even though it simply excludes light rather than physically disrupting weed growth.
Biological control methods use an organism to disrupt weed growth. Often the organism is an insect or disease and a natural enemy of the weed. This is called classical biological control. Classical is not the only form of biological control. Livestock can be effective weed-management tools if managed correctly. However, improper livestock management (overgrazing) can be extremely damaging to the environment and exacerbate weed problems.
Chemical control methods use herbicides to disrupt weed growth. The first rule of any pesticide use is to read the label before using the product and follow all directions and precautions. (NOTE: Avoid using soil-active herbicides, such as Tordon, Banvel/Vanquish/Clarity, Perspective, or Telar, near windbreak plantings and other desirable woody vegetation. Plant injury or death can occur. Do not allow any herbicide to drift onto woody or other desirable vegetation for the same reason.)
Weed Management Systems
A weed management system uses two or more control methods. The key is to encourage desirable plant growth with optimum fertilization, when necessary, and/or irrigation (cultural control) where applicable. Plant competition is an often overlooked tool and should be used first, but not exclusively. When enhancement of the desirable plant community is necessary, make sure you seed at optimum rates to ensure establishment and subsequent competition with weeds. Generally, perennial, sod-forming grasses compete best with weeds.
Till, hoe, hand-pull, mow or mulch (mechanical control) if desired. Herbicides (chemical control) are powerful tools that should be used judiciously, not exclusively. Herbicides may be a component of the weed-management system. Biological controls can also be part of a system. Several natural enemies currently are available from the Colorado Department of Agriculture. Livestock grazing can be effective, depending on the weed species, if the livestock are properly managed for weed control.
Posted onJun 28, 2017
Mosquito management is increasingly important, partly due to the West Nile Virus. The best time to manage mosquitoes is when they are in the larval stage. This stage, called wrigglers, lives in shallow water and feeds on microorganisms. They can be found in used tires, wheelbarrows, birdbaths, saucers under pots, ornamental pools and other places that hold standing water. Empty or flush out containers weekly to reduce or eliminate the larvae.
The mosquito-eating fish Gambusia can be released in ponds or other areas that have year-round standing water to control mosquito larvae. Gambusia may be available from your local health department or they may know of a source. Be sure not to release Gambusia in ponds and rivers that have game fish.
Microbial insecticides such as Bti (Bacillus thuringiensis israeliensis) can be effective. Bti is toxic to mosquito larvae but is not hazardous to non-target organisms. Bti may decrease midge populations and reduce fish food supply. In addition to Bti, insect growth regulators such as methoprene interrupt mosquito growth and development, preventing adult emergence. Insect growth regulators do not harm fish or other wildlife but do affect other insects and arthropods.
Use netting and screening to keep adult mosquitoes out of porches, decks and other living areas in the summer. Adult mosquito control in yards is best accomplished with pyrethroid insecticides. “Bug zappers” do not reduce mosquito populations but destroy many desirable natural insect predators. Their use is not recommended.
=====================================================
Plant Select®, a program designated to seek out and distribute the very best plants for gardens in the high plains to the intermountain region, has tracked its top five sellers from 2009. They include:
Penstemon x mexicali – Red Rocks® Penstemon and Penstemon x mexicali Pikes Peak Purple® Penstemon
These are both durable hybrid penstemons selected from crosses between Mexican and American wild penstemons made by Bruce Meyers. Narrow, dark green leaves grow on attractive mounded plants. Red Rocks® sports a constant succession of bright rose flowers all summer, while Pikes Peak Purple® chimes in with violet purples. Both thrive in a range of sites and soils.
Delosperma ‘Kelaidis’PP13,876 Mesa Verde® Ice Plant
This iridescent, salmon-pink flowered sport appeared among plants of a dwarf, alpine form of Delosperma cooperi at Denver Botanic gardens. It is vigorous, compact and floriferous.
Delosperma floribundum Starburst Ice Plant
This clumping ice plant produces a dome of bright pink flowers with eye-catching white centers. It starts blooming in June and continues until fall. It is an essential small scale ground cover or edging plant for any garden.
Gazania linearis Colorado Gold® Gazania
This plant has glossy mounds of deep green, strap-shaped leaves spangled with three-inch shiny yellow flowers throughout the growing season. This selection is cold hardy and does well under ordinary garden treatment, or in unamended, dry soils as well once established.
====================================================================
Be sure to check with the landlord before digging up an area for a garden. Offer to put an agreement in writing including details of what you will plant and how you will maintain it. Be clear that you will bear the financial responsibility of plants and maintenance and if necessary to restore it to its original condition when you move. To convince a reluctant landlord, mention gardening classes you have taken or show photos of past gardens. Plant an easily maintained garden. Avoid water gardens, invasive groundcovers, vines and exotic, hard-to-maintain plants.
Apartment and condominium dwellers may be limited by covenants or other restrictions, so check with the association or management. Pots and planter boxes come in many shapes and sizes, take up little space, and are movable and easily maintained. Container gardening books have lots of ideas.
Purchase plants according to the amount of sun exposure you have. Light requirements for plants to perform well are listed on the plant tags. Plants that require full sun need a minimum of six hours of sun light, light shade four to six hours, and two to four hours for partial shade plants. Some foliage plants do best in filtered light or continuous shade.
Other options might be to help with a neighborhood community garden, offer your gardening skills to an elderly homeowner, or volunteer your time with a local gardening club or the botanic gardens. Take advantage of the many ways to realize the benefits of gardening for yourself and others!
Posted onMay 20, 2017
When it comes to a residential landscape enlisting the help of a designer or landscape contractors is a smart idea. Here we give you some things to think about when it comes to creating the landscape for your yard.
A residential landscape is not just about having a well-tended lawn. A residential landscape is about making a statement and letting your personality shine through for the world to see in a single glance. It is scenery that can make your garden, lawn and yard look sensational and can help it to stand out from the crowd.
Some people have a knack for creating and designing their own landscapes while others need help in this area. If you are one of the latter then you need to hire landscape contractors that can beautify your surroundings and can give your property the appearance that you want it to have.
Landscape designs can be on a large scale or a small scale. It also depends on how much land you have, the ideas you have for it and how elaborate or simple you want it to be. It also has to do with the budget you have for your residential landscape. Regardless of which you choose, it is important that you make some plans before you call the contractors. Have a vision for your landscape and then communicate it to the landscape experts when you schedule a consultation with them.
Mistakes can occur because of faulty planning and that is not what you want. If you are new to the world of residential landscapes then you need to do some studying up on the topic. Speak with a local landscape designer about your plans and get some advice from someone who has been in the business for quite some time.
What can you do to create a landscape that is eye catching, well-planned out and simply lovely to behold? Diversity is important. You want to have a landscape that looks great all 12 months of the year. To do this you need to choose an array of plants and flowers that will complement your landscape. Different plants bloom at different times throughout the year and that is why you should carefully choose a variety and spread them out in various areas of your front, back and side lawns. Using only one kind of plant is uniform but also one-dimensional and can be downright boring.
Do you know anyone whose yard is overflowing with ornaments such as ceramic frogs, gnomes and other types of decorating items? There is nothing wrong with having a few of these positioned strategically about your yard, but too many can ruin your residential landscape design because they crowd out other things, such as plants, flowers, and shrubs. Ornamentation is fine, but do it with a light touch. Instead of having several small ornaments you might want to choose one or two larger ones.
If you like statues then select modern looking ones as opposed to Greek or Roman ones. White sculptures can work in some yards, but do not blend well in others. Depending upon the colors in your yard a bronze colored statue or sculpture could be a nice touch.
When selecting plants do not just think of the color of them. Consider the environment and select ones that will thrive on your property. Think about the type of soil you have, what areas of the lawn receive the most sun and the ones that receive the most shade, as well as the kind of weather that the region you live in is prone to. From there choose your plants.
Posted onApr 23, 2017
No, the snows not gone just yet, however it’s never too early to start your strategy for the coming landscape season. Whether you are needing help from a professional landscaper or doing things yourself, it’s that time again to get ready so when the frost is over your prepared.
1.) Before you get too excited in the garden area or nursery of your local home improvement store, know the climate for your home. This includes your geographic location on the Earth, as well as the climate of your yard. Choose plants appropriate for how much sun, and shade different parts of your lawn receive during the day.
2.) Similarly, to a do it yourself project, plan your strategy for your landscaping in advance. Are you going to break it up in phases, or are you going to hire a landscape professional to help you plan? Ask for guidance from your local nursery or neighbors who have beautiful landscaping! They can probably give you as good of advice as a professional.
3.) While you may think that all of you should plan for is sun and water for your landscaping, think again – pests such as wildlife, insects, and stray animals can wreak havoc on your landscaping. Plan if you will need fencing, wire mesh, or possibly planting natural plantings can deter and ward off many local pests.
4.) While you may be excited to plant your fruit trees and flowering shrubs, many plants will thrive better for years to come if you plant them at the suggested times of year that horticulturists and gardeners suggest. Look at gardening websites and ask at your nursery what times are best for the plantings you choose for your outdoor home.
5.) When choosing to landscape and sizes of plants, estimate how large the plants will grow in 6 weeks, 6 months, etc.… If you plant too many small shrubs in front of your living room window, and then find out they are small trees, you may have to dig them up soon! Most plants will have height and growth requirements on the pots when purchased from your nursery. Pay attention to these, before you plant.
6.) For some, inspiration comes from looking at neighboring yards, or traveling to other areas of your town to look at landscaping. While others seek inspiration from home and garden publications and satellite television do-it-yourself programs. Often a stroll through your local home improvement gardening center is all the inspiration to get you motivated.
7.) Once you know what type of plants you’d like at your home, map out, or stake out the area in which your plants will be planted. Estimate enough room for pedestrians walking around, as well as growth and future maintenance of your landscaping. Ensure walkways will have safe areas for footing, and tall plants will not obstruct view lines from inside your home.
8.) Unlike a paint color in your home, once it’s up you’re done, landscaping requires maintenance and care. From pulling weeds, watering and pruning, to occasional replacement of dead plants, etc… Once again, plan what plants will suit your maintenance schedule. Consider hiring a professional gardener or lawn service to take care of your yard if necessary.
9.) Low and high maintenance plants: The beauty of landscaping and gardening is there are plants for every lifestyle, as well as every taste! If your home has a rustic or desert aesthetic, ornamental grasses that grow wild may be more suitable for your home. While if you live in a tropical region, flowering plants and shrubs may be more suitable. Check with a professional to see which ones suit you and your home.
10.) Contrast with your exterior home: Your landscaping should be an enhancement of your exterior home. Choose plants that compliment or contrast the colors in your home as well as the architectural period of your home. A modern and minimalist home may enjoy a modern Zen-inspired landscape, while a Victorian home may have quaint gardens and flowering areas that are typical for the Victorian era. Plan your outdoor landscaping to be in harmony with your exteriors.
Posted onMar 17, 2017
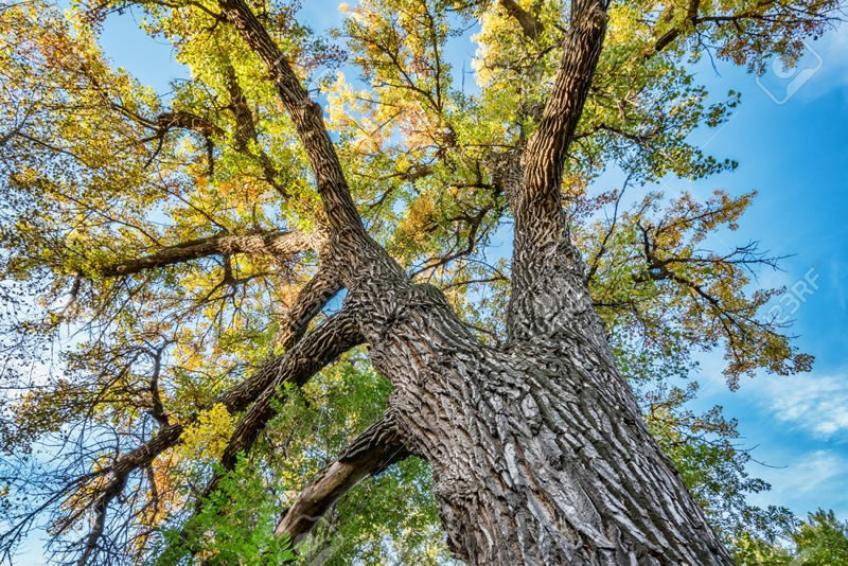
If a tree was planted properly in the best location, it should need little or no pruning. However, trees do not always grow as we imagined them to grow. Perhaps a branch is rubbing the house, or two trees grew wider than expected, and now the branches hit each other.
Pruning large trees is a safety issue, so hiring a professional is the suggested best way to handle issues like these.
When to prune trees: light pruning to remove a few small branches can be done at any time. More extensive pruning should be done in late winter/early spring, unless you have a sappy tree, like maples or fruit trees. Often it is necessary to prune trees when they are fully leafed out, so you can see where and how much to cut.
Most trees can be pruned at any time of the year. Some exceptions are American elms and crabapples which should be pruned in the winter to abate disease spread. Aspen, silver maples, birch and walnut trees exude sap if pruned in the later winter or early spring, but this will not harm the tree.
Why prune? Pruning can be thought of as cleaning – broken, dead or diseased branches, and those touching the ground, should be removed. Removing diseased branches can prevent further spread of disease. Overlapping or rubbing branches can introduce infection, so one or both should be removed. It is important to keep branches away from the sidewalk and street, where they are hazards. Weak and soft-wooded trees, like maples, should be thinned periodically to keep snow from breaking the branches and causing major damage.
How to prune: When pruning trees, be sure to use the proper tools, and be sure that they are all in good condition. Hand pruners are useful for branches less than one-half an inch thick. Loppers should be used for branches one to one-and-one-half inches in diameter. For limbs up to 20 to 30 feet high, use pole pruners or extension saws. Hand saws are popular, and can be useful for many different plants. Never remove more than one-third of a tree canopy during one season. Dead and dying wood can always be removed, but do not prune too much of the live wood.
---------------------------------------------------------------------------------------------------------
There are many benefits to using Colorado native trees for home and commercial landscapes. Colorado native trees are naturally adapted to their specific Colorado climate, soil, and environmental conditions. When correctly sited, they can be ideal plants for a sustainable landscape that requires reduced external inputs such as watering, fertilizing, and pruning. In order to realize these benefits, the planting site must approximate the natural environmental conditions of the plant in its native habitat.
Another benefit of using Colorado native trees in landscapes is that they attract a wide variety of wildlife including mammals, birds, and butterflies. Rapid urbanization in the state is reducing biodiversity as habitat is removed for building and road construction. Landscaping with natives on a large or small scale can maintain biodiversity that otherwise could be lost to development.
Not all native trees are available at all nurseries, so you may need to contact several commercial outlets to find a specific plant. If a tree is not sold in the trade, asking for it may help increase its availability. Native trees should not be collected from the wild because this reduces the biodiversity and causes a disturbed area that may be invaded by weeds.
There are several factors to consider when designing a native landscape. Due to Colorado’s variation of elevation and topography, native plants are found in many habitats. In order to maximize survival with minimal external inputs, trees should be selected to match the site’s life zone and the plant’s moisture, light, and soil requirements. Even if a plant is listed for a particular life zone, the aspect (north, south, east, or west facing) of the proposed site should match the moisture requirement. For example, a blue spruce, which has a high moisture requirement, should not be sited with plants of dissimilar water needs. Similarly, a blue spruce should not be planted on a south-facing slope, where a significant amount of additional moisture would be required.
Growing native trees does not exclude the use of adapted non-native plants. There are many non-native plants that are adapted to Colorado’s climate and can be used in a native landscape as long as moisture, light, and soil requirements are similar. If a site has a non-native landscape that requires additional inputs (such as an irrigated landscape on the plains), dry land native plants can be used in non-irrigated pockets within the non-native landscape. These native “pocket gardens” can be located in areas such as parkways and next to hardscapes that are difficult to irrigate.
Some communities regulate landscape appearance or the type of plants that may be used. So before completing a landscape design, check with local authorities, including homeowner’s associations, to discover any regulations that may affect your design.
Colorado can be divided into five life zones that are broadly defined by the plant communities that occur at the approximate elevations described below. The Plains life zone, 3,500 to 5,500 feet, is located in eastern Colorado where the majority of Colorado’s population resides. It is dominated by grasslands and streamside cottonwoods. In western Colorado, the Upper Sonoran life zone is located at altitudes below 7,000 feet, and in the San Luis Valley, below 8,000 feet. This zone is characterized by semi desert shrublands and piñon pine-juniper woodlands at its upper limit.
The Foothills life zone occurs from 5,500 to 8,000 feet and is dominated by dry land shrubs such as Gambel oak and mountain-mahogany, and in southern and western Colorado, piñon-juniper woodlands and sagebrush. The Montane zone consists of ponderosa pine, Douglas-fir, lodgepole pine, and aspen woodlands at elevations of 8,000 to 9,500 feet. Dense forests of Subalpine fir and Engelmann spruce dominate the Subalpine zone at 9,500 to 11,500 feet. The Alpine zone above 11,500 feet is a treeless zone made up of grasslands called tundra. Species requiring medium to high moisture occur along watercourses throughout all zones.
Successful establishment of native trees may require supplemental moisture after planting. Once established, the watering frequency can be reduced or eliminated, if the plant was sited in its native environmental conditions. Container-grown trees can be planted at any time during the growing season. Container-grown native trees are often grown in a soiless mixture of peat and bark, so the planting site should be amended with some organic material.
Using native trees offers many benefits in addition to reduced maintenance. Natives are part of our natural heritage and the ecosystems of Colorado. Native plant communities make Colorado visually distinct from the eastern, southern, or western United States. Native plant gardens are wildlife habitats and each plant contributes to the biodiversity of the state.