Posted on Apr 12, 2020

Home Sweet Home Landscaping is taking new COVID-19 protocols to take care of our clients and our crew to make sure everyone is staying safe. We continue to take care of our clients keeping in mind basic guidelines such as cleaning tools and equipment before and after each use, wearing masks and gloves during the workday and maintaining a safe distance of 6 feet between each other. Also, we are limiting the number of employees in our trucks. Please allow us to continue taking care of you, with our new safety guidelines in place. We hope that everyone is practicing social distancing and staying safe during these unprecedented times. We will come out of this together as a community stronger than ever! Stay safe and stay healthy! 


Posted on Sep 24, 2018

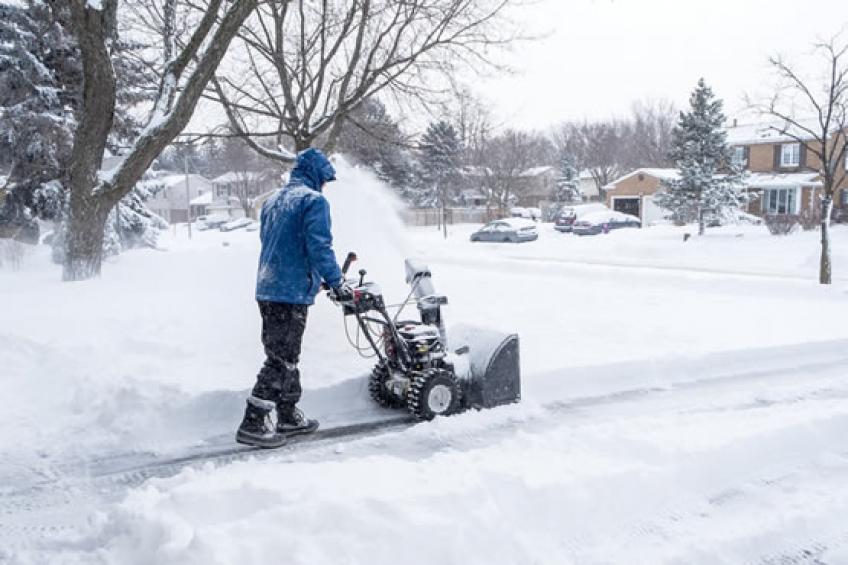
The rule of thumb in the mountains for snow removal contracts run from approx. November 1st - April 30th, which guarantees service throughout the winter season. So now is a reminder not to wait much longer to get your mind made up and your choices made on who and what kind of service your personal residence needs or your commercial business needs?

You know as we do that winter could come on quick and we as mountain people need to always be prepared. So, for you new comers to our beautiful mountains please be wise and start your plans now.

When it comes to winter, choosing a snow removal contractor you can count on is important. Unfortunately, some are better than others. The trick is to find a snow removal contractor you can trust. Here are seven tips to keep in mind that should help you decide.

Some snow removal contractors are definitely more reliable than others. But for you, as a customer, reliability should mean much more than just showing up on time. It also means conducting your business in a professional manner.

Ensure they have the proper credentials, check their background.

It’s important that a general snow removal contractor has in their general liability insurance a clause that specifically covers snow removal operations.

What's more, the municipality where you live should license your prospective snow removal company, if it’s required by law. A call to your local City Hall can answer the question quickly.

Vehicles must be registered. Ask for proof.

Ask them to provide references:

This is a given. Always check references!

If a company seems reluctant to give you names and numbers of previous customers, it's a red flag and suggests they have something to hide.

Be certain they don’t sub-contract out their work:

Sometimes companies sub-contract work to smaller companies, which allows them to cover a larger territory.

Be certain before signing a contract that the company who will do the work is the same one as the name on the contract.

Occasionally, sub-contractors may not live up to the promises you received before signing on the dotted line.

After all the work you've done to secure the most reliable, responsible snow removal contractor in your area, consider becoming a regular customer next season if you're pleased with their service. Repeat customers are frequently offered a discount the following year, which is a plus.

This from the BBB:

If you plan on hiring a snow removal contractor instead of shoveling yourself, Better Business Bureau recommends the following:

Get several estimates. Prices can vary widely and are usually based on the amount of work involved in clearing your property. Remember that the least expensive estimate is not always the best choice.

Ask the contractor about additional charges and price options. Beside the quoted price, there may be some additional charges during large storms. After the snow reaches a certain depth, some snow removal contractors charge by the inch, so you?ll want to find out how the company calculates these charges. Other contractors may offer a fixed price for an entire season, regardless of the amount of snow (or lack of snow).

Make sure that you are aware of which services you are getting.

Find out exactly what is included in the estimate. 

Are the walks and steps included?

What about the cost of sand and/or salt? 

Will the company clear only after the storm, or during the snowfall as well? 

If the contractor has to come back more than once during the same storm, is there an additional charge?

Ask for references, and check them out.

Check with the Better Business Bureau for a Reliability Report on a contractor you are planning on hiring.

Do not agree to the terms of the contract over the telephone. The contractor should provide you with a written agreement.

Before signing the agreement, find out who is responsible for damages such as cracked driveways or broken gates.

Your expectations of your snow removal contractor should be realistic.  Keep in mind that a snowstorm makes traveling difficult for you and the contractor. During major snowstorms, it may take longer for the contractor to reach you and perform the contracted work.

Posted on Aug 27, 2018

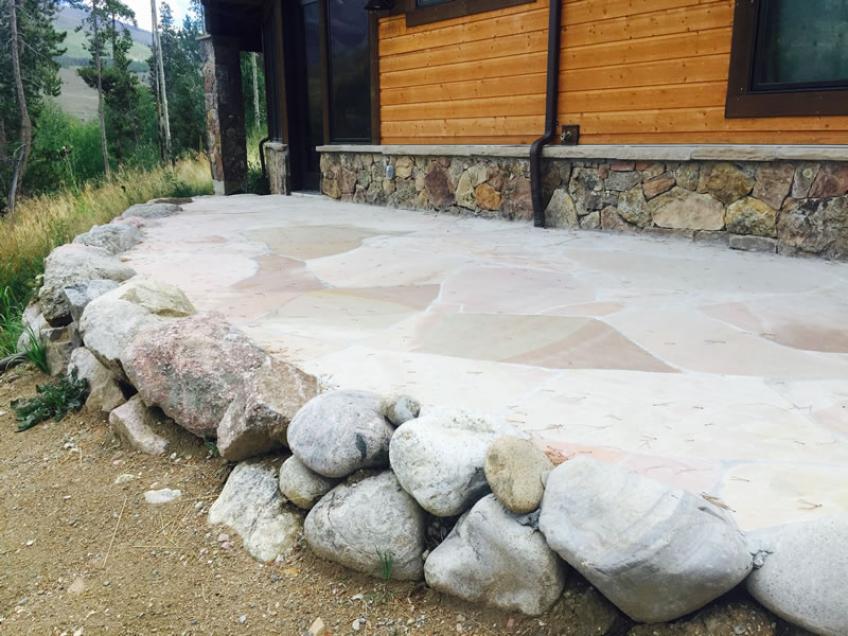
Flagstone- a flat stone slab, typically rectangular or square, used for paving and Walkways.

The Benefits, Uses and Different Types

Are you considering using Flagstone for your next project? Whether you're planning on building a flagstone walkway, patio or other landscaping feature, you'll find flagstone to be one of the finer stones for such a project. When it comes to using stones for home decor, flagstone walkways are always considered one of the superior to other stone products. Although many people think what could possibly be very special about a stone, an architect or home interior designer will think otherwise. Stones are not just another natural compound that is readily available, but it does have its unique identity. Stones like Flagstone are used specially for rendering outdoor beautification.

This stone is typically flat and can be used for a number of different things. The rock in which this substance is derived from is a sedimentary type. When pulled, it is cut in such a manner that it can be used for projects like creating a walkway. There are many different components that are found in this stone type.

Many refer to it as “sandstone” as it contains so many different elements. It is common to find quartz, calcium, and silica in this type of rock. This stone can be found exhibiting a number of different colors. The flexible color schemes make it an ideal solution for various projects in and around the home. You can find colors like browns, blues, reds, and even mixed colors. Here, you will learn a few interesting things about flagstone as well as a few ideas for integrating the use of this rock.

What is Flagstone Used For?

There are many unique uses when it comes to flagstone. Many individuals elect to use this stone when purchasing slabs for paving purposes – such as creating driveways, and even roadways that lead to the home. Many individuals who choose to put up s structurally sound fence around the home, or decorative areas in the yard – such as a garden or a pond – implement the use of this type of rock to do so. If you observe the architecture of homes that are designed in a Spanish style, it is common to observe this type of stone on the roofs.

Not just any home can support the weight of the slabs, of course. However, for those homes that can, this can be rather appealing. Many patios and sidewalks implement flagstone. You can also find memorials and stones in various cemeteries around the world composed of this substance.

Types of Flagstone

There are many different types of this stone in circulation today. Listed below, you will find a small list of the many different types of flagstone, as well as a small description of each. Keep in mind, though, that there are many varieties of this particular stone.

1. Patterned – This type of stone matches in dimension and overall appearance, with one exception – the colors.

2. Chilton Steppers – These stones are various and odd shapes and sizes but are combined to create a unique appearance.

3. Chaison – This type of stone also makes good use of various shapes, sizes, and colors to bring about a unique appearance.

Flagstone is quarried in places with bedded sedimentary rocks with fissile bedding planes. Examples include Arizona flagstone and Pennsylvania Bluestone.

Around the thirteenth century, the ceilings, walls and floors in European architecture became more ornate. Anglo-Saxons in particular used flagstones as flooring materials in the interior rooms of castles and other structures. Lindisfarne Castle in England and Muchalls Castle (14th century) in Scotland are among many examples of buildings with surviving flagstone floors.

Posted on Jul 27, 2018

Why Grow Native Trees? There are many benefits to using Colorado native trees for home and commercial landscapes. Colorado native trees are naturally adapted to their specific Colorado climate, soil, and environmental conditions. When correctly sited, they can be ideal plants for a sustainable landscape that requires reduced external inputs such as watering, fertilizing, and pruning. In order to realize these benefits, the planting site must approximate the natural environmental conditions of the plant in its native habitat. Another benefit of using Colorado native trees in landscapes is that they attract a wide variety of wildlife including mammals, birds, and butterflies. Rapid urbanization in the state is reducing biodiversity as habitat is removed for building and road construction. Landscaping with natives on a large or small scale can maintain biodiversity that otherwise would be lost to development.

Native trees should not be collected from the wild because this reduces the biodiversity and causes a disturbed area that may be invaded by weeds. Most of the trees listed in Table 1 are available as container-grown plants. Native trees often do not have as great a visual impact in the container or immediately after planting as do traditional horticultural species. Over time, they reward the homeowner with their natural beauty and other benefits. Where to Grow Native Trees There are several factors to consider when designing a native landscape. Due to Colorado’s variation of elevation and topography, native plants are found in many habitats. In order to maximize survival with minimal external inputs, trees should be selected to match the site’s life zone and the plant’s moisture, light, and soil requirements. Even if a plant is listed for a particular life zone, the aspect (north, south, east, or west facing) of the proposed site should match the moisture requirement. For example, a blue spruce, which has a high moisture requirement, should not be sited with plants of dissimilar water needs. Similarly, a blue spruce should not be planted on a south-facing slope, where a significant amount of additional moisture would be required.

Growing native trees does not exclude the use of adapted non-native plants. There are many non-native plants that are adapted to Colorado’s climate and can be used in a native landscape as long as moisture, light, and soil requirements are similar. If a site has a non-native landscape that requires additional inputs (such as an irrigated landscape on the plains), dry land native plants can be used in non-irrigated pockets within the non-native landscape. These native “pocket gardens” can be located in areas such as parkways and next to hardscapes that are difficult to irrigate. Some communities regulate landscape appearance or the type of plants that may be used. So before completing a landscape design, check with local authorities, including homeowners associations, to discover any regulations that may affect your design. Life Zones of Colorado Colorado can be divided into five life zones that are broadly defined by the plant communities that occur at the approximate elevations described below.

The Plains life zone, 3,500 to 5,500 feet, is located in eastern Colorado where the majority of Colorado’s population resides. It is dominated by grasslands and streamside cottonwoods. In western Colorado, the Upper Sonoran life zone is located at altitudes below 7,000 feet, and in the San Luis Valley, below 8,000 feet. This zone is characterized by semi desert shrublands and piñon pine-juniper woodlands at its upper limit. The Foothills life zone occurs from 5,500 to 8,000 feet and is dominated by dry land shrubs such as Gambel oak and mountain-mahogany, and in southern and western Colorado, piñon-juniper woodlands and sagebrush. The Montane zone consists of ponderosa pine, Douglas-fir, lodgepole pine, and aspen woodlands at elevations of 8,000 to 9,500 feet. Dense forests of Subalpine fir and Engelmann spruce dominate the Subalpine zone at 9,500 to 11,500 feet. The Alpine zone above 11,500 feet is a treeless zone made up of grasslands called tundra. Species requiring medium to high moisture occur along watercourses throughout all zones. Culture and Maintenance Successful establishment of native trees require supplemental moisture for one to several years after planting. Once established, the watering frequency can be reduced or eliminated, if the plant was sited in its native environmental conditions. Container-grown trees can be planted at any time during the growing season. Container-grown native trees are often grown in a soilless mixture of peat and bark, so the planting site should be amended with some organic material. Using native trees offers many benefits in addition to reduced maintenance. Natives are part of our natural heritage, and the ecosystems of Colorado. Native plant communities make Colorado visually distinct from the eastern, southern, or western United States. Native plant gardens are wildlife habitats and each plant contribute to the biodiversity of the state.

To see chart concerning Life Zones of Colorado go to:

http://www.co.summit.co.us/DocumentCenter/View/319/Native-Trees-for-Colo...


Posted on Jun 27, 2018

Select trees and shrubs for xeric landscapes based on both adaptation to Colorado’s climate and the ability to prosper in reduced water situations.

Assess site soil, drainage and exposure before selecting trees and shrubs.

Apply adequate water during the first years of plant establishment, then gradually reduce irrigation.

Woody plants are a long-term investment.

Plants that will prosper in Colorado’s climate without benefit of ample irrigation require careful selection. This is especially true of woody trees and shrubs that are more expensive investments than herbaceous plants, both in terms of money and time to grow.

As a long-term investment, select and plant trees and shrubs only after careful evaluation of the site’s soil, drainage and exposure to heat and wind. While some xeric plants tolerate reduced water, they may not function well in soils low in oxygen. Many of the state’s dense clay soils have minimal room to accommodate enough water and oxygen to meet plant root needs. Preparing soils by adding organic amendments prior to planting can often overcome water-oxygen concerns during initial establishment. Reduced water using trees and shrubs are best planted in areas separate from lawns, unless lawns are also a reduced water use type. Regardless of how durable woody plants are for survival in xeric conditions, many plants need at least two growing seasons to establish. Water during establishment, then gradually reduce irrigation.

Adequate soil drainage plays an important role in preventing soils from water logging, which leaves no room for oxygen. Conduct a subsoil drainage test by digging an 18 x 18-inch hole, filling it with water and timing how long it takes to drain. Water that stands in the hole for more than 30 minutes indicates poor drainage. If amending the soil doesn’t solve drainage problems, drain tile or planting on berms (mounds) of well-drained soil brought to the site may be other solutions. Build berms to a minimum height of 24 inches.

Some trees and shrubs may perform poorly in hot south or windy west exposures and are better sited in cooler east or north exposure.

The following list of durable trees and shrubs will prosper in reduced water situations. For more specifics, check with your local extension office for the best plants for your area and microclimate.

To see list click on link:

http://extension.colostate.edu/topic-areas/yard-garden/xeriscaping-trees...

Xeriscaping (zer-i-skaping) is a word originally coined by a special task force of the Denver Water Department, Associated Landscape Contractors of Colorado and Colorado State University to describe landscaping with water conservation as a major objective. The derivation of the word is from the Greek “xeros,” meaning dry, and landscaping — thus, xeriscaping.

The need for landscaping to conserve water received new impetus following the drought of 1977 throughout the western states and the recognition that nearly 50 percent of the water used by the average household is for turfgrass and landscape plantings.

Unfortunately, many homeowners have cut back on turfgrass areas by substituting vast “seas of gravel and plastic” as their answer to water conservation. This practice is not only self-defeating as far as water conservation is concerned, it also produces damaging effects to trees and shrubs. It is not xeriscaping.

Planning — An Important First Step

Whether you want to redesign an old landscape or start fresh with a new one, a plan is a must. The plan does not have to be elaborate but should take into consideration the exposures on the site. As a rule, south and west exposures result in the greatest water losses, especially areas near buildings or paved surfaces. You can save water in these locations simply by changing to plants adapted to reduced water use. However, don’t be too quick to rip out the sod and substitute plastic and gravel. Extensive use of rock on south and west exposures can raise temperatures near the house and result in wasteful water runoff.

Slope of Property

Slope or grade is another consideration. Steep slopes, especially those on south and west exposures, waste water through runoff and rapid water evaporation. A drought-resistant ground cover can slow water loss and shade the soil. See fact sheet 7.230, Xeriscaping: Ground Cover Plants, for suggested ground covers. Strategically placed trees also can shade a severe exposure, creating cooler soil with less evaporation. Terracing slopes helps save water by slowing runoff and permitting more water to soak in.

Reduce Irrigated Turf

Avoid narrow strips of turf, hard to maintain corners, and isolated islands of grass that need special attention. Not only is maintenance more costly, but watering becomes difficult, often wasteful. If your yard is already landscaped, see 7.234, Xeriscaping: Retrofit Your Yard, for information on ways to evaluate and eliminate unneeded turfgrass areas.

Bluegrass turf can be reduced to areas near the house or that get high use. In outlying areas, use more drought-resistant grasses or even meadow mixes containing wildflowers, particularly if your property is large. Refer to 7.232, Xeriscaping: Turf and Ornamental Grasses, for suggested alternatives to bluegrass.

Soil Preparation

Proper soil preparation is the key to successful water conservation. If the soil is very sandy, water and valuable nutrients will be lost due to leaching below the root zone. If your soil is heavy clay, common in this area, you will lose water through runoff.

A good soil, one that supports healthy plant life and conserves moisture, has a balance of rather coarse soil clusters (aggregates), sand and pore spaces. The “ideal” soil has as much as 50 percent by volume pore space, with the soil itself consisting of a good balance of sand, silt and clay.

A major problem with heavy soils is that clay tends to dominate the soil complex. Clay is composed of microscopic crystals arranged in flat plates. When a soil has a high number of these crystals, they act much like a glue, cementing the particles of sand and silt together and resulting in a compact, almost airless soil.

Such soils usually repel surface water, resulting in runoff. What water does get into these soils is held so tightly by the clay itself that plants cannot use it. Plants in a clay soil, even though it is moist, often wilt from lack of moisture. Plant roots also need air to thrive. In clay soils, air spaces are small and may be filled with water, so plant roots often suffer from oxygen starvation.

In very sandy soils, the opposite is true. Sandy soils have very large pore spaces. Because the particles are large, there is little surface area to hold the water, so sandy soils tend to lose water rapidly.

A good soil is not made in just one year. Add organic matter annually to garden areas. In areas to be sodded or seeded, add organic amendments as a one-time procedure. Take advantage of this one time before seeding or sodding by doing a thorough, complete job. This encourages deep roots that tap the water stored in the soil and reduces the need for wasteful, frequent water applications.

Xerigation — Saving Water with Proper Irrigation

Proper irrigation practices can lead to a 30 to 80 percent water savings around the home grounds. If a sprinkler system is already installed, check it for overall coverage. If areas are not properly covered or water is falling on driveways and patios, adjust the system. This may mean replacing heads, adding more heads, or changing heads to do a more efficient job.

With the system on, observe places that are receiving water where it is not needed. Overlaps onto paved areas or into shrub borders may result in considerable water waste. Overwatering trees and shrubs may lead to other problems.

Irrigate turf areas differently than shrub borders and flower beds. North and east exposures need less frequent watering than south and west exposures. Apply water to slopes more slowly than to flat surfaces. Examine these closely and correct inefficiencies in irrigation system design.

If you do not have a sprinkler system and are just beginning to install a landscape, you can avoid the pitfalls of poorly designed and installed systems. Have a professional irrigation company do the job correctly. Make sure the system is designed to fit the landscape and the water needs of the plants and that it is zoned to reduce unnecessary applications of water. Coordinate the landscape design itself, selection of plants and the irrigation system to result in a sensible water-saving scheme.

Consider a drip system for outlying shrub borders and raised planters, around trees and shrubs, and in narrow strips where conventional above-ground systems would result in water waste.

If you use hoses instead of an underground system, you can observe water patterns. Instead of watering the entire lawn each time, spot water based on visible signs of need, such as turf that begins to turn a gray-green color.

Avoid frequent, shallow sprinklings that lead to shallow root development. Compact soils result in quick puddling and water runoff. They need aeration with machines that pull soil plugs.

Trees and shrubs separate from the lawn are best watered with deep root watering devices.

Xerimulch the Landscape

Properly selected and applied mulches in flower and shrub beds reduce water use by decreasing soil temperatures and the amount of soil exposed to wind. Mulches also discourage weeds and can improve soil conditions.

There are two basic types of mulches: organic and inorganic. Organic mulches include straw, partially decomposed compost, wood chips, bark, and even ground corncobs or newspapers. Inorganic mulches include plastic film, gravel and woven fabrics. Sometimes a combination of both organic and inorganic is used.

If soil improvement is a priority, use organic mulches. Wood chips and compost are most appropriate. As these materials break down, they become an organic amendment to the soil. Earthworms and other soil organisms help incorporate the organic component into the soil. Organic mulch is preferred because most soils in this area are low in organic content and need organic amendments to improve aeration and water-holding capacity.

Inorganic mulches, such as plastic film, effectively exclude weeds for a time, but they also tend to exclude the water and air essential to plant roots. Woven fabrics and fiber mats are preferred over polyethylene films. Fabrics and mats exclude weeds yet allow water and air exchange. Used in combination with decorative rock or bark chunks, they often outlast the less expensive but short-lived polyethylene films.
 

Posted on May 28, 2018

There are so many choices to make for your new season of outdoor landscaping for plants and shrubs, however, we believe that choosing your native species is one very strong decision you can make for the best environmental sustainability for your local area, and here’s some reasons why.

Grow Native Shrubs! There are many benefits to using Colorado native shrubs for home and commercial landscapes. Colorado native shrubs are naturally adapted to their specific Colorado climate, soils, and environmental conditions. When correctly sited, they can be ideal plants for a sustainable landscape that requires reduced external inputs such as watering, fertilizing, and pruning. In order to realize these benefits, the planting site must approximate the natural environmental conditions of the plant in its native habitat. Another benefit of using Colorado natives in landscapes is that they may attract a wide variety of wildlife including mammals, birds, and butterflies. Rapid urbanization in the state is reducing biodiversity as habitat is removed for building and road construction. Landscaping with natives on a large or small scale can maintain biodiversity that otherwise would be lost to development.

The shrubs listed in Table 1 are grown by some Colorado nurseries and are becoming more available in the commercial sector. However, not all shrubs listed are available at all nurseries, so it may be necessary to contact a number of commercial outlets to find a specific plant. If a shrub is not sold in the trade, asking for it may help increase its availability. Native shrubs should not be collected from the wild because this reduces biodiversity and causes a disturbed area that may be invaded by weeds. Most of the shrubs listed in Table 1 are available as container-grown plants. Native shrubs often do not have as great a visual impact in the container or immediately after planting as do traditional horticultural species. Over time, they will reward the homeowner with their natural beauty and other benefits.

There are several factors to consider in designing a native landscape. Due to Colorado’s wide variation of elevation and topography, native plants are found in a variety of habitats. In order to maximize survival with minimal external inputs, plants should be selected to match the site’s life zone and the plant’s moisture, light, and soil requirements. Even if a plant is listed for a particular life zone, the aspect (north, south, east or west facing) of the proposed site should match the moisture requirement. For example, a red twig dogwood, which has a high moisture requirement, should not be sited with plants of dissimilar water needs. Similarly, a red twig dogwood should not be planted on a Mountain-mahogany fruit (Cerocarpus montanus ) south-facing slope, where a significant amount of additional moisture would be required.

Growing native shrubs does not exclude the use of adapted non-native plants. There are many non-native plants that are adapted to Colorado’s climate and can be used in a native landscape as long as moisture, light, and soil requirements are similar. Even if a site has a non-native landscape that requires additional inputs (such as an irrigated landscape on the plains), dry land native plants can be used in non-irrigated pockets within the non-native landscape. These native “pocket gardens” can be located in areas such as parkways and next to hardscapes that are difficult to irrigate.

Some communities regulate landscape appearance or the type of plants which may be used. So before completing a landscape design, check with local authorities, including homeowner’s associations, to discover any regulations that may affect your design.

For the list of shrubs in Table 1 spoken of here in this blog go to your local extension service at:

http://www.summitcountyco.gov/DocumentCenter/View/318/Native-Shrubs-for-Colorado-Landscapes

And also ask your landscaper and we are sure they can provide all you may be seeking for your new season of outdoor landscaping.


Posted on Apr 26, 2018

Low humidity, fluctuating temperatures, a short growing season, poor soil characteristics, watering restrictions (in some cases), wildlife, wildfire, and drying winds make gardening in the mountains a challenge.

Selecting plants that tolerate these conditions is key to Colorado mountain gardening.

Gardeners who are patient, know how to select plants that will do well and manipulate the soil and microclimate, will be amply rewarded.

Gardeners new to mountain communities of Colorado often have trouble getting plants to thrive or even survive. There is no doubt that gardening in the mountains can be challenging, particularly above 7,500’. Sunlight is usually of high intensity and the humidity generally is low. Combinations of cool nights, a short growing season, drying winds, steepness of slopes, aspect, topography, and soil all influence how well plants perform in this climate. Wildlife can also be an issue. Most of these challenges can be overcome with proper site preparation and plant choices.

Site Choice

To determine where to plant your garden, first evaluate your site. The best place to grow flowers is in a site that already supports some grass, wildflowers, or even weeds. This will usually be in a fairly sunny, open area. If the area has weeds, control them before planting something new. Aspen groves are an ideal environment for many plants, but other open areas also work well.

If dense evergreen trees cover your desired garden area and there is little vegetation growing underneath, most plants are unlikely to thrive. It may be necessary to remove the conifers and add organic matter to make these areas plantable. Likewise, if the soil is very rocky and there is no existing vegetation, increasing the organic content of the soil is critical.

Soils

There are two major types of soil found in the mountains. Light-colored decomposed granite soils, are low in organic matter, dry out quickly, and do not absorb heat well. They are usually high in most nutrients except for nitrogen. Clay soils are also high in nutrients, but generally have poor drainage.

Soil preparation is often the key to growing healthy plants in the mountains, particularly for non-native plants. Native plants are often adapted to leaner soils (lower in organic matter), and may ‘flop’ or have a shorter life span in well-amended soils.

In general, it is beneficial to add organic matter to any type of mountain soil, although in poorly drained soils it is best to add some each year, rather than all at once, in order to avoid salt buildup. Incorporate 2 to 3 inches of organic matter (or 3 cubic yards per 1,000 square feet of garden), such as alfalfa pellets, compost, or aged manure, to a depth of 6 to 12 inches. Avoid using Colorado mountain peat, as it is a non-renewable resource, has too fine of a texture, and is alkaline. It is best to work organic matter into the entire area that will be planted. If this is not feasible, dig a larger than necessary hole, and amend the backfill with 20 percent soil amendment. This also helps to prevent a ‘soil texture interface’ when planting nursery-grown container plants. The soil around the roots in a container is often high in organic matter, while the native soil can be lower in organic matter and may be a different texture. This soil texture interface may cause a zone beyond which the roots will not grow. Test the soil after adding organic material for nutrient deficiencies. Contact your Colorado State University Extension county office for soil test information.

Raised Beds

Raised beds can solve many problems for mountain gardeners. Raised beds can be created with good, weed free soil, and are especially beneficial if soils are poorly drained or are very rocky and hard to dig. They also warm faster in the springtime and can help to protect the plants from burrowing rodents if a ¼” wire mesh (hardware cloth) is tacked onto the bottom before the soil is added.

Microclimates

The successful mountain gardener learns to exploit or create microclimates. For example, gardens placed in full sun (southern exposures) will have a longer, warmer growing season than other exposures. These warm or hot microclimates are the places to experiment with plants that need more heat during the growing season to come into flower before frost. If the site is protected in the winter, this is also a place to experiment with less hardy plants. Another good site for more tender plants is in front of rock formations or walls (natural or created) where the thermal mass can raise winter temperatures.

Because plant growth is slowed by cool mountain soil temperatures, creating a perennial bed that slopes towards the south or using raised beds will cause plants to grow faster and emerge earlier in the spring due to the increased soil temperature. These plants may be vulnerable to late spring frosts. Gardens on south-facing slopes are warmer and drier than gardens on north-facing slopes of the same valley at the same elevation.

Some mountain areas have a reliable blanket of snow over much of the winter. This acts as insulation and may allow less hardy plants (zone 5 or 6) to overwinter. Snow blankets can be encouraged in specific locations by putting up a snow fence; this will cause snow build up on the lee (downwind) side of the fence. This same snow blanket, however, may cause some xeric plants to rot out during the winter, even if they are cold hardy.

Also consider the flow of air; at night, cool air drains down to low spots. Valley floors may be over 10 degrees F cooler than surrounding gardens on hillsides above the valley floor.

Strong winds can cause plants to dry out. Dessiciation (To remove the moisture from a thing that normally contains moisture, such as a plant; to dry out completely; to preserve by drying) can be reduced by using fences, trees, or shrubs to create a wind barrier.

Plant Choice

Even though many mountain gardeners live in wooded areas, ‘woodland plants’ are seldom good choices – this term in catalogues usually refers to Eastern woodland conditions (moist, organic rich, acid soils, and humid air). We have few to none of those conditions in our mountain areas.

Plants with smaller leaves will often require less water and will also experience less damage from hail.

Be cautious with late-blooming plants or plants that are heat-lovers, as they probably won’t bloom before frost. This is because plants need to accumulate enough growing-degree days in order to mature. Late-blooming plants and heat lovers require more growing-degree days to develop.

In general, choose plants that are hardy to zones 2 to 4. Low temperatures are not the only factor in whether a plant will overwinter, however. Other factors include day length, source of plant material, recent temperature patterns, rapid temperature changes, soil moisture, wind exposure, sun exposure, and carbohydrate reserves.

Native plants are some of the best plants for the mountains because they are already adapted to the harsh conditions.